Friday 26 August 2011

Summer comforts

Last time I checked it was meant to be august and we should have lovely summer weather but as I'm sure most of you have realised the weather isn't exactly matching the season. When it gets cold, wet and windy all I crave is home cooked comfort food and chicken, leek and bacon pie fits the bill perfectly in this case. When it comes to pies I think most of the time you can get away with using ready made pastry as it's just as good as home made stuff. Of course if you wanted to make special pastry like cheese pastry then i'm all for making it from scratch but in times like this then its the shop bought stuff for me. I found this recipe in Cook in Boots which has a whole chapter on comfort food which is amazing and perfect for this weather. I served the pie with some sweet potato mash and all together it was a hug on a plate that was much needed. Below is the original recipe but I added some bacon in with the chicken because everything is better with bacon.

Cock-a-leekie Pie
Serves 6

8 chicken thighs, skinned, boned and chopped into bite-sized chunks
salt and pepper
1 large knob of butter
2 leeks, trimmed and chopped into thick chunks
250g chestnut mushrooms, halved
leaves stripped from 4 bushy sprigs of thyme
zest and juice of 1 lemon
2 tbsp plain flour
1 glass white wine
200ml double cream
3 tbsp flat leaf parsley
375g ready made puff pastry


Preheat oven to 200°c/gas 6. Season the chicken and fry in the butter until sealed on all sides and it has some colour on it. Add the leeks, mushrooms, thyme and lemon zest. Once the mushrooms are nutty and brown, sprinkle in the flour and keep stirring for a minute, then pour in the wine. When the wine has nearly evaporated, pour in the cream and lemon juice, mix and simmer for 5 minutes. Stir in the parsley and put in the bottom of a large pie dish. Leave to cool.
Roll out the pastry on a lightly floured surface until 1cm thick and drape over the pie dish. Cut away the excess pastry and go around the edge with a fork pressing it down. Brush with beaten egg or milk and bake in the oven for 25 minutes. Serve with mash and enjoy.


My First Culinary Creation

Looking back on my posts I have realised that all of them involve recipes from other chefs or people so I wanted to try out one of my own creations. I love unusual flavour combinations and trying out new things so when I discovered a white chocolate and cardamon mousse which tasted fantastic, I immediately wanted to try making some cupcakes in the same flavour. I looked about on the internet for some white chocolate cupcake recipes but they are a little hard to come by. I eventually did some mashing together of different recipes to ensure I had the right components in, especially milk so that i could infuse the cardamon with it. I also wanted to try out a new kind of icing that I discovered and I'm really glad I did. It is the most amazing icing I have ever had and is definitely worth the effort. Its called Italian meringue butter-cream and you can find the recipe on thepinkwhisk which is a blog by one of the runners up in the first Great British Bake Off (best program ever?) I'm glad to say the cakes turned out nicely and so did the icing though it was a little runny to start with, I just added some extra butter and 70g of melted white chocolate and it stiffened up to perfection. I have yet to get feedback from people at work but the boyfriend says they are my best cakes ever (he says that about all my cakes though because he is lovely.)


White Chocolate & Cardamon Cupcakes

100g butter, softened
170g caster sugar
2 eggs
200g plain flour
1tsp baking powder
125ml milk
8 plump cardamon pods (green cardamon)
100g white chocolate


  • Preheat the oven to gas mark 3/160°c. 
  • Take your butter and sugar and beat together until pale and fluffy then add in your eggs and mix until combined. 
  • Put the milk and cardamon in to a saucepan and gently heat through until it simmers and the milk has taken on the flavour of the cardamon. 
  • Whilst doing this put your chocolate in a Bain-marie or a bowl over a saucepan of water (make sure the water isnt touching the bottom of the bowl or the chocolate will burn.) Heat until the chocolate is half melted and then take off the heat and keep stirring. The residual heat will finish melting it. 
  • Strain the milk through a sieve in to the melted chocolate and stir together but make sure the milk isn't boiling or the chocolate will burn. 
  • Once this is done combine a third of the flour with the egg mix and then add a third of the chocolate milk once mixed in. Repeat this until everything is fully combined. 
  • Fill your cupcake cases 2/3 full and put in the oven for 20 to 25 minutes or until golden brown. Once cool, top with your choice of icing. 

Wednesday 24 August 2011

Happy Birthday Next Starbucks!

On the 13th August it was my store's first birthday and to celebrate my boss asked me to make some cupcakes. She had ordered some edible cake toppers from top your cake with the Starbucks logo, for me to put on top of them and let me have creative freedom on the flavour. To suit every one's tastes I went with a pretty neutral flavour of caramel cupcakes as who doesn't like caramelised sugar? I have a lovely recipe by the hummingbird bakery which I have used before for my boyfriends birthday cakes. They went down really well the first time so I chose to redo the recipe which is always a good sign for me. The only difficult ingredient is the tinned caramel but most big supermarkets do it even if your small local shop won't. A great bake for something special or even just for a Saturday afternoon baking.


Hummingbird Bakery Caramel Cupcakes


For the Sponge:

280g caster sugar

80g unsalted butter softened 
240g plain flour
1 tbsp baking powder
1/4 tsp salt
240ml whole milk
1/2 tsp vanilla essence
2 large eggs
150g tinned caramel or dulce de leche


For the Frosting:

500g icing sugar
160g unsulted butter
50ml whole milk
100g tinned caramel or dulce de lech plus extra to decorate


I find this recipe a little backwards as i'm so used to beating the butter and sugar, then the eggs and then adding the dry ingredients carefully but it does work!

1.  Preheat the oven to 190 C (375 F). Gas mark 5 and line a muffin tin with muffin cases
2.  Using a hand-held electric whisk or a freestanding electric mixer with the paddle attachment, whisk together the butter, sugar , flour, baking power and salt on a low speed until crumb-like in consistency.
3.  Place the milk and vanilla essence in a jug with the eggs and whisk by hand until combined.  Pour three quarters of this mixture into the dry ingredients and mix together on a slow speed, then increase the speed to medium and keep beating until smooth and thick.  Scrape down sides of the bowl, then add the remaining milk mixture and the tinned caramel and continue to mix until all the ingredients are incorporated and the batter is smooth.
4.  Divide the batter between the muffin cases, filling each by two-thirds.  Any remaining batter can be used to fill one to four more cases in a separate tin (there will be loads left over).  Place in the oven and bake for 18-20 minutes or until well risen and springy to touch.  Leave to cool for a while in the tin, then transfer to a wire rack to cool down fully while you make the frosting.
5.  Using the electric whisk or freestanding mixer with the paddle attachment, beat the icing sugar with the butter on a low speed until combined and still powdery in texture.  Slowly mix in the milk, and once it is incorporated, increase the speed to high and whisk until light and fluffy.  Add the caramel and beat in well.
6.  Spoon the frosting on to the cupcakes once they have cooled, smoothing it on with a palette knife and swirling the frosting.  If you want to decorate the cakes, spoon some tinned caramel or dulce de leche into a piping bag with a small nozzle and pipe on to the cakes in little hearts, or whatever shape takes your fancy.

Monday 22 August 2011

Sweet Sundays

For the last few weeks my friend and partner in crime from work have been meeting up every Sunday to bake some delicious creations. It started off with him wanting to try out a recipe for sweet potato pie which he had in America and fell in love with. It was always something on the foodie list so I said we should give it a try and my god am I glad we did. It sounds a little weird but it goes on the same principle as using carrots to make cake, sweet vegetables do work in dessert. We used ready made shortcrust pastry to save on time and effort and in fact it worked out really well. I was worried that the savoury pastry would not go with the sweet filling but it actually balanced the pie out nicely and any sweet pastry would be too much. We found the recipe here and it is so easy to follow. What you end up with is a pie with similar taste to an egg custard tart but with the lovely added flavour of the sweet potatoes. Really good little pudding which can be whipped up in a hurry or really nice if you are craving a little Christmas cheer, even if it is August.

Saturday 13 August 2011

Epic Meal Time


So since I'm a total food slut, when I discovered the youtube videos by epicmealtime I obviously fell in love with them instantly. Most of their meals include the staples; meat, cheese and bacon. A lot of bacon. Upon watching many a meaty video, my friends and I were inspired to create an epicmealtime of our own. We took our inspiration from the Meatball Deathstar but in the end it was more like a meatloaf of joy. There isn't much of a recipe list as the basic ingredients are simple. This is more of a guide and hopefully inspiration for other people to create bacon and cheese filled meat dishes.

Epic Meal Time

1kg beef mince
500g grated cheese
1 egg
Salt & pepper
1 packet of Tortellini
1 jar tomato pasta sauce
1 packet of garlic bread

Start by putting the mince, most of the cheese (hold some back to make a couple layers in the meatloaf), egg and any herbs you choose. I went with oregano. Mix up together and then add some seasoning. Put a layer of the meat mixture in the bottom of a loaf tin or big ovenproof dish. Cover the sides too. Then put a layer of cheese down. As you're doing this, you should have the pasta boiling and cook for about 4 mins. Add this next once you've drained the water. Next put a final layer of cheese and the rest of the mince to enclose your little cheesy meat package. We magically had the right amount of everything, hopefully you will have the same kind of luck. Bake in a moderate (190°c/gas mark 5) for about 45 mins or until firm to touch. Turn it out in to a serving dish and pour the heated tomato sauce over the top. Serve with the cooked garlic bread and enjoy!


We also made some candy bacon but were a little overzealous with the heat in the oven so most of it burnt. The bits we rescued were absolutely delicious and I would recommend any one who likes bacon and sugar to try it! Just put some streaky bacon on a tinfoil covered tray and sprinkle with soft brown sugar (it must be dark sugar!) Put in a medium oven (190°c/gas mark 6) until nice a crispy but not black like us! 

Wednesday 10 August 2011

Margarita Cupcakes

I stumbled across a dream of a food blog the other day which has filled me with envy and a whole new list of things I want to try. I still had an excess of Mexican ingredients including a lot of limes and a tiny splash of tequila that somehow got missed so when I spotted a recipe for margarita cupcakes I just had to try them. The recipe from the amazing food blog is here but sadly the measurements are in the American system so I had to do a little conversion of all the ingredients. Luckily for you I wrote these measurements down and will now share them with you. This recipe makes really lovely cakes and I've been told by the boss and chums at work that they are my best lot yet.

Margarita Cupcakes
Margarita Cupcakes:
makes 12-16

110g softened butter
225g caster sugar
2 eggs
2 limes, grated zest and juice
1/4 tsp vanilla extract
4 fl oz buttermilk
225g self-raising flour (I think you're meant to use plain but self raising gives more air in your cakes)
1 1/2 tsp baking powder
1/4 tsp salt
1 tbsp tequila, for brushing the tops of the cakes

The recipe tells you to mix the batter in a different way to how I did mine. Its just the way I know best and means you can get a lot of air in the eggs before adding the dry ingredients.

  1. Preheat oven to gas mark 3/160°C
  2. Beat together the butter and sugar until pale and fluffy then add the eggs and continue to mix on medium speed so that you get some air in to them. After doing so add the lime zest and juice and the vanilla. Give it a little mix but don't worry if it separates, it will all come together.
  3. Mix the dry ingredients in a bowl and then slowly fold in a third to the egg mix. Next add a third of the butter milk. Continue like this until both have been added fully and it has just come together. You don't want to over mix the flour or beat out the air. 
  4. Divide in top cupcake cases and fill about 1/2 or 3/4 full. You don't want them to over flow during baking as mine did.
  5. Bake for 20/22 minutes until firm to touch and a skewer comes out clean. Don't be alarmed if they are quite pale on top, mine were like that too. Just ensure they are cooked through. Let them cool on a wire rack but while they are still warm brush the tops with the tequila.

Tequila-lime Frosting

225g butter
375g icing sugar
1 1/2 tbsp lime
1 tbsp tequila 
pinch of salt

Mix the butter and sugar with an electric whisk for about 5 minutes to get it really light and fluffy (I've never actually taken the time to do this apart from for this recipe and it really makes a difference! The icing came out amazingly!) Once this is done add the lime, tequila and salt. Give it a taste and add more tequila if you think its needed.

Once the cupcakes have cooled either spread the icing on top or use a piping bag. Garnish with a little grated lime zest.

Tuesday 9 August 2011

Yes you MexiCAN

I've decided to distract myself from the news with my food blog as I'm just getting too angry at what is going on in London at the moment. Last week was definitely Mexican week for me as pretty much every meal had a Mexican theme to it. I even hosted a Mexican evening with friends from work which was meant to involve lots of food and drink but ended up with more of the latter. I did manage to make some Quesadillas and nachos in between blending up batches of makeshift margaritas but of course the idea of taking photos of them didn't pop in to my head at the time. However I did have extra of the ingredients left over then next day so when it came to finding a hangover cure I decided to remake the quesadillas and hoped they would do the trick. And that they did! Those lovely toasty cheese filled pockets are perfect for when you're feeling a little low and need a pick me up. They are also perfect for using up things in your fridge as you really can put anything you like in them! I'm going to put a very basic recipe here but really it can be changed to whatever ingredients you choose. All you need is the tortillas and some cheese and then the world is your oyster.

Quesadilla:
Makes lunch for 2 or 1 hungry person

2 tortilla wraps
Half a red pepper cut in to little pieces
Some finely sliced spring onions
Some freshly chopped coriander
Fresh chopped chili to taste
Lots of lovely grated cheese, whichever is your favourite (cheddar and red Leicester are good, try mexicana cheese too)
Any meat of your choosing, I had some roast chicken in the fridge so used that but you could use anything or nothing!

The best way to do this is mix all your ingredients, except the tortillas of course, in a bowl and then pile them on top of the first tortilla to create a nice layer and then top off with the other tortilla. I chose to put the first tortilla in the pan already and then top it so that I didn't have to try and move the quesadilla once assembled. Then all you need to do is put the lovely little parcel in a pan over a medium heat. You want the cheese to melt so that it gets stuck together inside but also for the tortilla to brown and crisp up on the outside. Once the tortilla reaches a nice golden colour on the first side, you need to be skillful and flip it without all the filling falling out. Cook the same way on the second side and once all the cheese has melted and you have a nice crispy quesadilla, remove from the pan on to a chopping board. Cut in to quarters that you can pick up with your hands and eat easily. Serve with a little sour cream, salsa or guacamole. Whatever takes your fancy!

Friday 5 August 2011

Death by chocolate

I'm taking a break from the mammoth menu as even I'm bored of it so god knows what you guys think. As I said at the start of my blog, I have a lot of nice foodie things that I want to share stored up and as I have a free evening I'm trying to catch up a little. I think this recipe will go down really well and is really good for many occasions; birthdays, Easter or just for when that craving for something really rich and chocolatey kicks in. I made mine at Easter so made it in to some kind of nest creation with eggs in, however you can easily just use fresh berries to cut through the richness of the cake. This recipe is also really good for Celiacs or people who can't have gluten as it doesn't have any flour in at all, making it a really light cake. 


Death by Chocolate
makes 1 medium cake


For the sponge:
300g good-quality dark chocolate
150g unsalted butter, diced
5 medium free-range eggs, at room temperature
1/2 tsp vanilla extract
100g caster sugar


For the topping:
200g good-quality dark chocolate
100ml double cream


You will also need a 22cm springclip tin greased with butter and the base lined with greaseproof paper.


Preheat the oven to 180°c/350°F/gas 4. Break up the chocolate and put it into a heatproof bowl with the butter. Set over a pan of steaming hot but not boiling water and leave it to melt, stirring frequently. Don't let the base of the bowl touch the water either or your chocolate will burn. Once melted, remove from the heat and let it cool while you whisk up the eggs. 
Break the eggs into a large bowl and whisk with the vanilla briefly to break up, then add the sugar and whisk on full power until pale, very thick and mousse-like and about 5 times the original volume. It will take about 5 minutes and once ready will leave a ribbon shape when the whisk is lifted out the bowl. Add the melted chocolate to the eggs and gently but thoroughly fold in with a metal spoon. 
Pour in to the tin and bake for 35 to 45 minutes until firm to the touch. Make sure it is still slightly moist in the centre as its hard to cut if over cooked. Remove from the tin once cooled (you may need to cut it out) and invert on to the plate so the flat bottom becomes the top. Melt the chocolate and cream together in the same way as before to make the topping but only until half the chocolate is melted. Once you get to this stage take it off the heat and beat until glossy. Pour over your delicious chocolate cake and decorate. I added some finely grated chocolate to get the nest effect. 


Mammoth dinner/picnic menu part 2.5

 So here we have the second part of the starter and now you might be beginning to see why it is called the mammoth picnic menu. The second step was a cured salmon side called gravadlax which is originally a Nordic dish and is particularly famous in Sweden (you may have seen some in the food market of Ikea.) It is a lot like eating smoked salmon but without the obvious smoked flavour. It is a good way to ease someone in to eating raw fish as it is raw but cured so doesn't have the scary property of getting ill from raw fish. This Jamie Oliver recipe uses beetroot in the curing process too so the salmon ends up a beautiful deep pink/purple colour on the outside. It takes 2 days to cure the salmon but once cured, it will keep in the fridge for about 2 weeks so you can make this well in advance leading to a stress free dinner party or picnic. Serve the gravadlax in thin slices (exactly the same as smoked salmon) with some watercress or lettuce leaves and the sour cream sauce. The recipe makes quite a lot but I think its nice to put some effort in to something that you can keep in the fridge which is delicious but doesn't involve cooking. An easy lunch or light dinner, ready in an instant!


To make it easy for me and probably better to follow for you, here is the link for the recipe of Beetroot Gravadlax

On another note, as I write this I'm watching a food programme (I told you I was obsessed) and the chef has just made his own gravadlax and recommended it for picnics. What are the chances?!

Mammoth dinner/picnic menu part 2

For the starter of the epic menu I did two dishes, a consomme and some cured salmon. This post is going to be about the consomme and the first bump in the road on the journey to picnic heaven. The dish is a tomato consomme and is basically a clear soup/drink that tastes of tomatoes and in this case a small amount of vodka (my parents like their drink and I wanted to play more on the idea of Bloody Marys.)
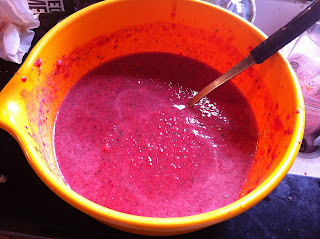
The recipe is again by Jamie Oliver (I find his recipes are very easy to follow and would recommend any of his books for beginner chefs) and involves blitzing all the ingredients and straining through some fine muslin or he also suggests a tea towel. So upon reading the recipe I decided to go for the cheaper option and used one my mum's nice clean tea towels to strain the soup. The recipe is very easy but has quite a lengthy process of letting the liquid drip through the bag for about 7 hours. If you squeeze it through then you don't end up with a nice clear soup so its best to let it drip for as long as possible. I was very organised and made the soup on the Tuesday and let it drip overnight, so it would be ready well ahead of Friday morning. So when it came to tasting the delicious tomato flavoured soup on Wednesday morning, imagine my disappointment when it had a rather strong hint of Lenor. What the lovely Jamie doesn't tell you is that if you use fabric softener on your tea towels then your soup will end up tasting of that.
Luckily I had enough time to remake but it definitely wasn't the cheaper option in the long run as I had to buy a load more tomatoes and a jam strainer with a special little stand. I'm really glad I did retry the recipe though because the results were wonderful. Its the perfect soup for a lovely hot summer evening and great to have with a meal or as a starter by itself because it's so light! If you can be bothered with the effort and have a love for tomatoes then give it a try.
I have photos of both attempts including the evil tea towel, my soup came out rather pink because of the beetroot so don't put too much in.


Tomato Consomme

1 Bunch of fresh basil, including stalks. Save the baby leaves for a garnish in a small bowl in the fridge
2 Kg Fresh tomatoes, make sure they are really ripe and tasty as they make the dish
1 x 5cm Piece of fresh horseradish or 3tsp of grated horseradish in a jar but not creamed!
1/2 Clove garlic (I added a little more as I love garlic)
1-2 tbsp Red wine vinegar
Measure of Vodka (again this is to taste)
1 small slice of beetroot for colour
Sea salt and black pepper

Start by taking all of the ingredients except for the seasoning and blitzing them up in a food processor until smooth. You may need to do this in batches as I did and empty it all in to one big bowl. Once blitzed give it a try and season to taste. You should be able to taste the horseradish quite strongly so don't be afraid to have quite a punchy taste to your mixture. Make sure the pepper is seasoned correctly because if you add after straining you will have little black bits in your lovely clear soup. Put your muslin over a bowl and ladle the mix in to it. Gather up the corners and tie in to a bag shape. Somehow hang your bag in the fridge over a bowl to collect your beautiful soup. I just used the jam strainer over a bowl and left it on the side in the kitchen as by this point I had run out of fridge space. Leave for as long as you can or until the bag stops dripping. You will be left with a dry tomato mush which you can throw away. Once fully strained, give it a taste and adjust any vinegar for tartness or vodka for alcoholics. Keep in the fridge so its nice and cold. When serving dot the pretty little basil leaves and a couple drops of oil on top.


Tuesday 2 August 2011

Mammoth dinner/picnic menu part 1

I have decided to bite the bullet and begin to write about my little project I had last week. Basically my parents were going to glyndebourne last week, which is a rather posh affair where people go to see some opera and take 4 course meals to picnic on in the gardens during the intervals. There is a restaurant there also but my parents prefer to take their own food when the weather is okay, which thankfully it was! They had only just got back from holiday the night before they had to leave for the opera so the task fell on me to cater for them. Of course I was excited at the idea of coming up with a menu and doing my first proper dinner party, even though I wouldn't be dining on the results. However as the week went on and I hit a few bumps in the road I began to regret saying yes! I will come to that though. Today I start with the canapes and one of the most successful dishes from the menu, a chicken liver parfait. For those who don't know, parfait is a smooth and silky version of pate which is absolutely delicious. If you're afraid of trying liver but want to give it a go, eat something like this. You have the lovely flavour of the liver plus a lot of butter and booze which will make anything taste good but you don't have the strange consistency that most offal tends to have. Plus its quite cheap to make and will make a lovely starter or light lunch, perhaps not with the amount of brandy I used but you can always replace that. I got the recipe from one of Jamie Oliver's book and he suggests using rabbit or duck livers as well if you can get them. Plus you can play around with the herbs you use and of course the alcohol. I do like to use recipes which you can change to your own tastes and Jamie's recipes do tend to offer that.

Chicken Liver Parfait:
Serves 4-6

400g Butter
Olive oil
1 Onion, finely chopped
2 Cloves Garlic, minced or chopped
455g Chicken Livers (Rabbit or Duck if you can get them) trimmed (cutting out the tough white stringy bits)
1 Bunch of Thyme, leaves picked and chopped
1 Large Wineglass of Brandy
Salt & Pepper
Sage leaves to decorate


You begin by taking 150g of the butter and clarify. I actually did mine in the oven at a very low heat of 110 degrees so that I didn't have to keep checking on it and worry about it burning. Put some oil in a frying pan and gently fry off the onions and garlic for about 5 mins or until soft but don't let them colour. Then put them on a plate and give the pan a little bit of a wipe. Turn up the heat and add a little more oil and the livers and thyme, fry on one side until the livers begin to brown off, then give the pan a little shake so they flip and add the brandy. If you have a gas hob it will light so watch out for your eyebrows! If not you can light them so you can see when the alcohol has burnt off. You need to make sure the livers don't over cook or your parfait will be grainy. Take them off the heat the flames go and when they are still pink, even if they are a little under cooked they will finish cooking from the heat when you blend them up. Put all the onions, garlic and everything in the pan in a food processor and blend until smooth. Give it a taste and season with the salt and pepper. Then slowly add the leftover butter from your 400g in cubes. Once it is totally blended together, pass through a sieve (I did this twice and gave what was left in the sieve to the dog and cat which made them very happy indeed.) Pour your parfait in to one big bowl or individual ramicans. Next just lightly fry off your sage leaves in oil until they are slightly crispy but be careful not to burn as I did with the first batch! Add the leaves to the top of the parfait and then pour over the clarified butter. Put in the fridge until its set which will take at least 3 hours. It will then keep for up to 2 weeks in the fridge as the butter seals it. Enjoy with some crusty white bread or toast.

Short and sweet.

Sorry for the lack of posting after my very short run as a blogger. I've been at home on holiday and had a mammoth task of preparing a dinner party for my parents. It was very exciting and I got to try lots of new things which makes for an interesting read but along with that, as well as a few heavy days of socialising, I have been somewhat kapoot (if that is even a word?) I decided to do a short entry before bed just to keep my sparse group of readers entertained.
So the recipe of today is chocolate cookies! Always a favourite with any normal folk but this recipe (or recipes) has a nice little twist to spice things up a bit. Excuse the pun. My boyfriend and I made a batch of these each, I went for the chilli and he went for the ginger. As much as it pains me to say I think the ginger ones were better but that was only down to them being a bit sweeter. The kick from the chilli goes really well with the chocolate and would go down well with people who don't usually have a sweet tooth. When I make these again (they were that tasty) I will probably use milk chocolate with the chilli to sweeten them up a touch.
The cookies were delicious warm but also good for the few days they lasted after baking. We were super cool and took them warm in a bag to the midnight showing of Harry Potter. Hey I know how to live life on the wild side.

Chocolate & Chilli Cookies:
Makes 12

100g plain flour
1 tbsp cocoa powder
1 tsp baking powder
1/2 tsp bicarbonate of soda
1/2 tsp ground cinnamon (I actually used ground ginger in both recipes)
50g muscovado sugar
50g butter
1/4 tsp mild fresh chilli (I used dried chilli flakes and lots of them, the flavour may have been better with the fresh chilli however)
2 tbsp golden syrup
100g plain dark chocolate, finely chopped

Stir up all the dry ingredients in a bowl and then add the butter and chilli. Rub together as you would a crumble mix until you have a mixture that resembles fine breadcrumbs. Then add the syrup and mix with a spoon and then your hand until you have a ball. Knead in the chocolate and then shape the dough into a sausage shape. Slice your sausage (hehe) in to 12 and then roll each little chocolate lump in to a ball and arrange on greased or lined baking trays. Cook them off in batches at 180 degrees, gas mark 4 for 8 to 10 minutes or until they crack on top. Leave for as long as you can for them to cool before moving them or in my case eating them.

Chocolate & Ginger:
Make them in the same way as above but replace the chilli and cinnamon with 2 tbsp of chopped stem ginger, I added a little ground ginger to make them even more delicious!